Wednesday, August 31, 2011

My Memories Scrapbook Software Winner!!!


Thanks to all of you who entered in my first giveaway!!  Now onto the winner....

*
*
*
*


Congratulations Sheila!!!  I will be sending you an email shortly with instructions on how you can redeem your Digital Scrapbook Software!! 

And for rest of you who didn't win, don't forget that you can still receive a great deal on the software and in-store credit... 10$ off the software and 10$ for instore credit.  Just enter in promo code STMMMS41141when you go to check out.

Tuesday, August 30, 2011

Don't forget...Digital Scrapbook Software Giveaway!!

We had a crazy weekend, and yesterday I was at a sales tax workshop..............I just wanted to remind you...
Don't forget about the fabulous giveaway going on here at Small Town Life!!  It ends tonight at 11:59pm CST.  I will choose a winner tomorrow morning via random.org.

The winner will receive a free download of My Memories Suite Scrapbooking Software v2.0 ($40 value).  So one of you will be able to start creating digital scrapbook pages too.  It's really simple on how you can enter, so click here to check out the ways you can enter to win!!  Go spread the word!!!

If you aren't the winner or don't want to wait, they are also offering my readers a special deal.  10$ off the software and 10$ for instore credit.  Just enter in promo code STMMMS41141when you go to check out.

Thursday, August 25, 2011

My Memories Digital Scrapbook {Review & Giveaway}


If you know me, I love to do anything creative, and I wish I had the time and patience to sit down and put together a scrapbook.  However, I don't.  My Memories contacted, asking for me to do a review of their digital scrapbooking software.  I was pretty ecstatic to give this a try!  The wonderful thing about digital scrapbooks, is its all done on your computer...no mess, no clutter, and it's easy to use.

Before I downloaded the software I started browsing their website.  They have different kits to choose from, some cost and some are free.  They have pre-made templates, or you can create your own from scratch.  You can print your pages and put them together in an album, you can create a slideshow of your pages and share them with your friends and family, you can even add sound and other interactions to your pages. 

From their website:
My Memories Suite will help you build beautiful pages from scratch or to make a page using one of the many professionally-designed scrapbook templates provided within the scrapbook software. A large collection of papers and embellishments are available at your fingertips to help you make each page uniquely your own. Drop in your in pictures in seconds-then crop, edit, retouch and rotate them right on the page. If this were any other scrapbooking software, you might be finished. But with My Memories Suite, the real power-and fun-of this software is just beginning.
You can make a beautiful scrapbook an interactive memory experience for anyone who sees it. Use simple one-click options to enhance your scrapbooks, with music, narration, video, and even the Internet. Go beyond pictures by showing off video of the birthday party, or record a narration to capture the memories that pictures alone cannot. With My Memories Suite you simply don't look at a scrapbook-you experience it!
After I downloaded the My Memories Suite Scrapbooking Software v2.0, I got to work on my very first scrapbook page.  I downloaded a couple of free kits to choose from, and then started narrowing it down to what I wanted.  I created one from Mel & Dustin's wedding last year...

Click to enlarge

I used the "Moment" digital pack, adding in some gradient colored text and fun embellishments.  Their colors were Yellow & Charcoal, which I just loved (pretty popular colors right now)!  Don't you just love it?

I know I'm having a lot of fun creating pages; you'll probably start seeing more posts from me sharing my digital scrapbooking creations. 

THE GOODS: Lucky for you guys, they have offered one of my readers a free download of My Memories Suite Scrapbooking Software v2.0 ($40 value).  So one of you will be able to start creating digital scrapbook pages too.  It's really simple on how you can enter, up to 6 entries (leave a separate comment for each entry). 

1.) You MUST be a GFC Follower of this blog, comment telling me you are.  If you aren't already, please click follow and comment telling me you did.  This is mandatory.
2.) Go to My Memories website, and come back and comment what your favorite digital paper pack or layout is.
3.) Blog about this giveaway, come back and leave your blog link in a comment.
4.) Follow My Memories blog, Like My Memories on Facebook, and/or Follow My Memories on Twitter. (leave a separate comment for each)

If you leave an anonymous comment, please be sure to add your email address so I have a way of contacting you.  This giveaway ends at 11:59pm CST Tuesday August 30th, and the winner will be chosen via Random.org and announced Wednesday morning.  Any comments left after the deadline will not be counted.

And if you can't wait to hear if you've won or not, they are offering all of my readers a special deal.  10$ off the software and 10$ for instore credit.  Just enter in promo code STMMMS41141when you go to check out. 

Good luck and let me know if you have any questions!


Linking up too...
It's A Blog Party
The Girl Creative
Today's Creative Blog
The Shabby Chic Cottage
What Allie's Making Now
Somewhat Simple
Lovely Crafty Home
The Sisters of the Wild West
Polka Dots on Parade
Just a Girl
Ginger Snap Crafts

Wednesday, August 24, 2011

Zucchini Chips

Our Zucchini plant has really taken off, so I've been cooking with it a lot lately.  Last week I made Zucchini Boats and some Heavenly Zucchini Bread.  This week I made Zucchini Chips (original recipe here)...I must say these are different, but in a good way.  I burned some of them, so the ones that aren't too done taste a lot better, but I think I sliced them too thin.  I think adding in some spicy seasoning, like red pepper flakes or even cayenne pepper would be great!  Maybe I'll do that next time.

I found this recipe on myrecipes.com, and they looked too good not to try.  It's a really easy recipe, the worst part is slicing the zucchini up, that took some time.

source

Ingredients:
1/4 cup dry breadcrumbs
1/4 cup (1 ounce) Italian Blend Cheese
1/4 teaspoon seasoned salt
1/4 teaspoon garlic powder
1/8 teaspoon freshly ground black pepper
2 tablespoons milk (I used 2%, that's what I had)
2 1/2 cups (1/4-inch-thick) slices zucchini (2 small or 1 large)


Directions:
Combine first 5 ingredients in a medium bowl, stir together.

 
Place milk in a shallow bowl


Dip Zucchini slices in Milk

Dredge in breadcrumb mixture.

Place coated slices on an ovenproof wire rack coated with cooking spray; place rack on a baking sheet.
(no picture, sorry)

Bake at 425° for 30 minutes or until browned and crisp. Serve immediately.
Tip: They are really good when they are fresh out of the oven, so try to serve them right away. 
They would be awesome I think with some marinara sauce or some other kind of dip.  Have any idea's?  Please share away!!

Be sure to come back tomorrow morning (8/25/11)...I'm having my FIRST giveaway!!!

Friday, August 19, 2011

Happy 1 Year Anniversary to Small Town Life!!

HAPPY 1 YEAR ANNIVERSARY...

source
Mmm...I wish I had some of these cookies right now!! :)

Ok actually yesterday, August 18th, was the 1 year mark for this little blog.  I can't believe how much I've actually gotten into this whole blogging thing!  I'm addicted to blogging and blog stalking!  It just started as a personal outlet that I could talk about random happenings going on in our life, awesome recipes, and fun crafts.  I've gotten a lot more out of it than that...looking for inspiration for projects, finding and trying out new recipes, and most of all connecting with you all! 

So I just want to thank all of my followers out there for your kind comments, emails and such, which has inspired me to continue on with this blog.  I'm hoping in the next year I'll be able to host some giveaways, have a lot of projects and recipes for you, possibly open my own etsy shop for fun, and have a blast blogging. 

And for those of you who read my blog on a normal basis that aren't currently following me, go ahead and click follow on the right side of my blog!!  Don't be shy!  ;)

HERE'S TO YOU AND ME....CHEERS!!  Have a fabulous weekend!

Source: Google Images


Thursday, August 18, 2011

Amazing Zucchini Boats

One thing I love about having a garden is the fresh produce that you get from it.  This summer has been really hot, so we haven't had a whole lot produce.  However, it hasn't been as hot lately (95 compared to 110, I'll take it) so our plants have started producing.  We picked 2 good sized Zucchini's Saturday, and I picked another one last night.  We have more little ones starting up, can't wait!  Last night I wanted to make something new with the Zucchini, and I also had some hamburger thawed out that I needed to use up.  So I got to searching around and found this recipe for Zucchini Boats on Tasty Kitchen.  I knew I had to give it a try, and of course adapting the recipe to our liking (click above for the original recipe, below is what I made).  My recipe will make 4 Zucchini Boats, and you may or may not have some hamburger filling leftover.

Ingredients:
2 Zucchini (not too small), cut length wise
EVOO
Salt & Pepper to Taste

1 lb Hamburger
1/2 cup of Onion, diced
2-1/2 tbsp Bread Crumbs
2 tbsp Milk
1 large Egg Yolk
Seasonings for Hamburger to taste: Salt, Pepper, Italian Seasoning, Seasoning Salt, and Garlic Salt.
1 can of Tomato Sauce
Seasonings for Sauce to taste: Pepper, Italian Seasoning, Garlic Salt, and 1-2tsp of Brown Sugar
Italian Blend Shredded Cheese

Directions:
1. Turn on oven to Broil, slice Zucchini in half length wise, and make a "boat" by digging out the insides leaving some around the edges.  I used a knife and a spoon, melon baller would be perfect if you have one.  Peel part of the bottom off so they will lay flat on the baking sheet.

2. Brush EVOO on Zucchini, and sprinkle with some salt & pepper. Broil for 10-12 minutes, or until tender.

3. Add Hamburger and the remaining ingredients (except for Tomato Sauce, Sauce Seasonings, and Cheese) and brown together.

4.  In a separate bowl mix the Tomato Sauce and seasonings together, then add into browned Hamburger mixture.

5. Once Zucchini is tender, take out of oven and begin spooning in the Hamburger mixture.  You'll want them heaping a little bit. Sprinkle Italian Cheese on top.

6. Broil for 3-4 minutes until cheese is melted and bubbly on top.  Let them cool for a few minutes and devour!

They are pretty simple to make, the hardest part is scooping the zucchini out.  I told Dustin it's like eating your cake and getting your vegetables too!!  They are THAT delicious!  HAHA!!  And don't throw the insides out, you can use that to make some Heavenly Zucchini Bread, I'm baking some tonight!  Holler! 


What is your favorite thing to make with Zucchini...do share!! :)

PS - If you have any of hamburger filling leftover, this would be great on a hamburger bun sprinkled with cheese...eat it like a sammie!


Linking up too...
At Home With Haley
It's A Blog Party
The Girl Creative
Today's Creative Blog
The Shabby Creek Cottage
What Allie's Making Now
Peas & Crayons - What I Ate Wednesday
Somewhat Simple
Lovely Crafty Home
Just a Girl
The Sisters of the Wild West
Polka Dots on Parade
This Chick Cooks
Ginger Snap Crafts

Wednesday, August 17, 2011

Baby Maycee's Nursery!

Remember one of my best friends daughter, Maycee Ellen?  Well Danielle finally sent me a picture of her nursery with the chipboard letters I made her for her baby shower.  Remember those caaauuuute letters that I just loved making?


Here they are in her nursery, I think they look so adorable abpve her crib, just the way I imagined.  The PERFECT color scheme!  Love how they look!
Sorry for the poor picture quality, came from a phone!


What do you think?


Linking up too...
It's A Blog Party
The Girl Creative
Today's Creative Blog
The Shabby Chic Cottage
What Allie's Making Now
Somewhat Simple
Lovely Crafty Home
The Sisters of the Wild West
Polka Dots on Parade
Just a Girl
Ginger Snap Crafts
Bear Rabbit Bear - Under Twenty Somethings Party

Friday, August 12, 2011

Garden Update

I wanted to give/show you an update on our garden progress.  Temps have been cooler here, so instead of 110 degrees its been in the 90's; I can handle that and apparently so can our garden!  It's finally starting to come around.  Our plants are looking great; have tiny cucumbers set on (finally) along with a couple that are ready to pick this weekend, have picked a few zucchini since the last time I gave you an update and several starting, still only have 1 watermelon but the plant looks like it will produce, have picked several okra when it was hot hoping to get a few more soon, and 0 peppers and tomatoes yet, but still growing and looking great. 

Ok, enough talking, here are some pictures straight from my phone, didn't have time to crop.

Whole garden...don't mind the messy backyard! Its in progress!

Watermelon

Zucchini - really has taken off

Zucchini - ready to be picked

Cucumber #1

Baby cucumbers on #1

Cucumber #2

Cucumbers almost ready to be picked on #2

Cucumber #3...had a late start, but already has little guys on it!

Okra plants...behind the cucumber plants in the front

Red Pepper plant

Jalapenos

Tomatoes - they are getting really big, just need some to set on.


Well we're off to have a fun weekend with our friends, Aimee & Ryan!  Hope ya'll have a great one!

Wednesday, August 10, 2011

Summer Subway Art Tile

I know this is a little late, but it's better late than never...right?!  And you all know how much I love creating subway art, I just had to make one for the summa-time! 

Summer love!
I used my newest Cricut font cartridge, Simply Sweet, for everything except for "Summer".  Since I was too late to purchase the SCAL program (Cricut no longer works with SCAL), I decided I needed to find cartridges cheaper than what they normal are.  You have to watch, but typically you can find them cheaper at Amazon.com or Ebay.com.  I bought this particular font cartridge on Ebay for $21 (free shipping, woot woot!), but it took me a little while with the bidding wars.  I love the font of this cartridge, it's playful, which was perfect for a summer tile.

close up of Summer
 
Love it, so fun!
I'll eventually make one for Fall/Autumn and Winter.  Here a couple of my other seasonal subway art tiles that I've created... (I've also created more for gifts)

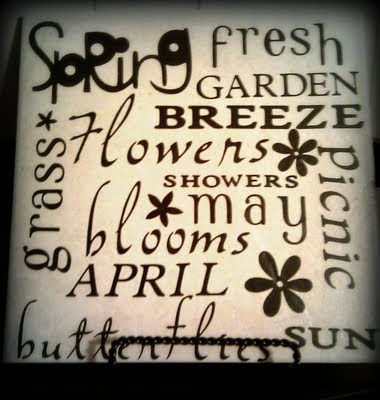
Sping Tile
 
Patriotic Tile...will be great for 4th of July, Labor Day, and Memorial Day!


PS - Needing some Heat Transfer Vinyl for T-Shirts and other fabrics?  Expressions Vinyl is offering 15% off all Heat Transfer products until Wednesday August 17th!  When you go checkout, just enter in promo code HOTHOTHOTThey have a bunch of fun colors to choose from, and it's a great price; not to mention different sizes for different machines.  I plan on purchasing some to make my Bridesmaids some cute Tanks or T-Shirts! 


Linking up too...
It's A Blog Party
The Girl Creative
Today's Creative Blog
The Shabby Chic Cottage
What Allie's Making Now
Somewhat Simple
Paisley's Passions
Lovely Crafty Home
The Sisters of the Wild West
Polka Dots on Parade
Lovely Crafty Home
Just a Girl
Ginger Snap Crafts

Tuesday, August 9, 2011

Old Time Photos

This last weekend my grandparents came to visit us.  I love it when we get visitors, it makes me feel loved! ;)  Saturday we hung around the house, took them around town, and showed them where we work.  Saturday night we took them out for supper, and my dad ended up meeting up with us.  After that we took them to a nearby county fair, they had sprint car races (which is the type of racing motors D helps build), turns out it was their first race.  They really enjoyed it, and to top it off one of our motors took 2nd!  He would've taken first, but on the last lap, some guy decided to run up on his wheel and almost spun him out.  We weren't very happy about it, but at least he took 2nd (the past 2 races before that he took 1st, so that's great!). 

Sunday I cooked them a yummy breakfast consisting of  Bacon (cooked on the grill, soo yummy!), scrambled eggs, hash browns, toast, and some fresh watermelon.  It was delish!  Then off to Dodge we went to check out the Boot Hill Museum...or so we thought.  We got there, they also had their annual summer celebration going on, so we strolled the vendors, bought me a really cute hat, and off to the museum gift shop we went.  We just missed the gun fight reenactment, which would've been fun to watch, but kind of glad, because it was 100 degrees out.  So we settled on getting some old time pictures taken...it was so much fun!  It only took them about 5 minutes to take a few different shots and we were done.  I would love to do this again!
I think Grandpa & D look awesome!
go ahead, click it to make it larger
This one makes me giggle!
click it to make it larger.
After that we took them out to the casino, had a snack, D lost $20 in 5 minutes, and back home we came!  Last night we hung around the house, cooked them supper, and took them over to D's grandparents to meet each other.  They left this morning.  It was a really nice weekend, and I cherish the time I am able to spend with my family. 

Last night we met with our photographer for the first time, pretty stoked about them doing our pictures!  The rest of the week we will gear up for some more visitors from the {big city}, my bestie Aimee & her fiance Ryan!  They will be here Friday afternoon and I'm super stoked!! 

Wednesday, August 3, 2011

My hott fireman!

Last weekend was our county fair, and Friday evening they had a little parade.  I just had to go to see my future hubby, he looked so handsome up on the truck!  He wasn't in his normal get up, but still pretty hott lookin'!! ;)  The firemen worked at the fair Friday and Saturday nights in the beer garden.  So I went out and supported them, and danced to the bands!  It was a lot of fun!!
 
There he is!! :)
 
The newest edition, pretty!


Tuesday, August 2, 2011

Strawberry Lemonade Bars...perfect for a hot summer day!

A few weeks ago I was reading a blog that featured these yummy Strawberry Lemonade Bars from K&K Test Kitchen blog, I knew I just had to make them!  I've never even had lemon bars, let alone make them.  So Saturday morning I got up and made them for the pool party.  I was a little nervy since I hadn't ever made them, but they turned out fantastic!  They are sweet, tart, and down right amazing!  I can't wait to make them again.
I didn't take pictures, theirs look amazing!


I copied the recipe from K&K Test Kitchen and added my notes in pink.

Ingredients
Crust:
1/4 cup sugar
1/2 cup butter, room temperature
1 1/2 cups all purpose flour
1/4 tsp salt

Filling:
1 cup fresh lemon juice - I used probably 1/4 of fresh squeezed lemon juice, then I ran out of lemons, so I just used lemon juice that you buy, it worked just fine.
2-3 tsp lemon zest
1/2 cup pureed strawberries (about 3/4 cup berries) - I used frozen strawberries, perfect!
1 1/4 cups sugar
4 large eggs
1/4 cup all purpose flour
1/2 tsp baking powder
1/4 tsp salt

Preheat oven to 350F. Lightly grease a 9×13-inch baking pan.

Begin by making the crust.  In a large bowl, cream together sugar and butter, until smooth and fluffy. Working at a low speed, gradually beat in flour and salt until mixture is crumbly. Pour into prepared pan and press into an even layer. Bake for about 17 minutes, until set at the edges.

While the crust bakes, prepare the filling.  In the bowl of a food processor, combine lemon juice, lemon zest, strawberry puree, sugar and eggs and process until smooth. Add in flour, baking powder and salt, then pulse until smooth. - I don't have a food processor, so I just used my blender, it did a great job!

Gently pour the filling over the hot crust when it has finished baking. Return pan to oven and bake for 23-26 minutes, until the filling is set (There will be a light colored “crust” on top from the sugar in the custard – nothing to worry about).

Sprinkle the bars with some powdered sugar.  Cool completely before slicing and use a damp knife to ensure clean slices.  Store bars in the refrigerator, especially on a hot day.  Makes 24 bars. - I think next time I'll wait to sprinkle them with powdered sugar until right before serving.

These were so refreshing on a hot summer day!


Linking up too...
At Home With Haley
It's A Blog Party
The Girl Creative
Today's Creative Blog
The Shabby Chic Cottage
What Allie's Making Now
Peas & Crayons - What I Ate Wednesday
Somewhat Simple
Paisley's Passions
Lovely Crafty Home
Just a Girl
The Sisters of the Wild West
Polka Dots on Parade
Little Brick Ranch - Foodie Friday
This Chick Cooks
Ginger Snap Crafts