Sunday, December 23, 2012

Merry Christmas to You!

Merry Christmas to You!!
 
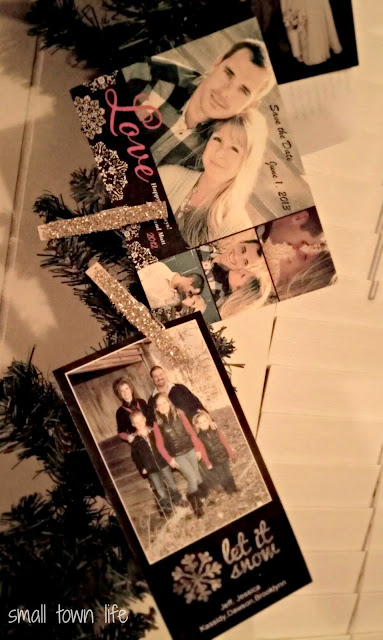
We didn't get around to sending out Christmas Cards this year,
but I did create one online really quick. I'm not sure where the time has went,
but I guess time sure does fly when you're having fun!!
 
D and I will be celebrating Our First Christmas as Mr. & Mrs. on tonight!
I plan on making us a delicious supper, having dessert, open presents, and watch a movie together!
 
Christmas Eve we will go over to D's parents in the afternoon to do Christmas with them,
and then it's off to his Grandparents for supper, gifts, games, and shenanigans!
 
Christmas Day, we will get up early in the morning and go to my family Christmas, Dad's in the morning/afternoon, and Grandparents/Mom late afternoon/evening.
 
'Tis the season to be busy and but always making time to spend it with Family!!
 
From our family to yours...
Have a Merry Christmas!!


Friday, December 21, 2012

2012 Burlap Christmas Tree

I've had our tree up for a couple of weeks now, but I just haven't gotten around to blogging about it. I finally took some pictures of it during the day, and at night (on my phone) so I could share it with you all.

burlap tree

This year I wanted something a little different. I was over the multi-colored lights that were on my tree that I have had for years. I was over the maroon & gold colors with tons of different ornaments. And I was over the tree skirt I've also had for several years. I wanted something new, but I couldn't justify spending money on another tree, when the one we had would suffice for the time being. I was going to sell it, but decided against it.

2011 Christmas Tree

What I wanted was a nicer looking faux tree, white lights, burlap ribbon, and pretty silver, gold, brown, and white ornaments. I also am in love with the ruffled tree skirts that sell on etsy for an easy $80, which I couldn't justify purchasing. I didn't mind buying a few ornaments, and some burlap ribbon, but the rest was out of the budget.
 
burlap tree
 
 
So this is what I ended up doing...using the tree we already had, but not plugging the multi-colored lights in. Adding a few strands of white lights that a friend gave me for free before the wedding, wrapping burlap/jute ribbon around it, using new & some old ornaments, and using a cream colored ruffled table skirt Ashley gave me last spring as the tree skirt! So the only thing I ended up having to purchase was some new ornaments (spent maybe $20, most from Hobby Lobby, a few from Target), and 4 rolls of burlap ($1.99 each on sale)!! I think it turned out pretty darn cute, and just the look I was going for (well, for the most part)!


The only thing I am missing is a tree topper, but I haven't found one that I absolutely love. I was going to make a large bow out of the burlap ribbon, but it's not wired and I'm not very good at making them. It doesn't look bad without it, I don't think.


And the improvised tree skirt, which is really a table cloth...I ABSOLUTELY LOVE IT!! Thank You Ashley if you're reading this!! :) You can't even tell it's not an acutal tree skirt. The table cloth itself only has 1 layer of ruffle, but I folded it in half and lined the ruffles up to make it look a little fuller. I got all of our presents wrapped and put under the tree, so you can barely see it now. Before I loaded it up I took a picture with just a few under it so you could see it!


Do you have all of your Christmas shopping done, and presents wrapped?


Linking up too...
It's A Blog Party
Today's Creative Blog
The Shabby Chic Cottage
Somewhat Simple
Lovely Crafty Home
Polka Dots on Parade
Ginger Snap Crafts
Six Sisters Stuff
Semi Homemade Mom

Wednesday, December 19, 2012

Glitter Clothespins - Christmas Craft

Did you see how I held my JOY Cardboard Christmas Letters up? I used these gold glitter clothespins, which are also holding our Christmas Cards onto the garland. I just love this idea, and they are so easy to make! I'm sure this one is also an "already known how-to", but again I couldn't resist sharing with you all!


For this easy project, you will need:
  • plain wooden clothespins
  • modge podge
  • glitter (I used gold)
The only thing you need to do is cover the top part of the clothespin with modge podge, sprinkle on your glitter, and let it dry! It is as simple as that! I think it took me maybe 10 minutes to do 24 of them, if that. These are something you can use to display artwork, pin gift tags onto your gifts, hold up your Christmas Cards onto garland (or even twine), etc. It's the little details that can really dress things up a bit!

clothespin cardholders

As for my JOY letters, I'm not 100% sure I will keep them where they are. I am thinking of putting my burlap bubble wreath in the center of the windows, and putting the JOY letters somewhere else. Maybe at the top of the windows, or stringing them across our mirror. I'm going to play around with it, and see which I like best!


Linking up too...
It's A Blog Party
Today's Creative Blog
The Shabby Chic Cottage

Tuesday, December 18, 2012

JOY - Cardboard Christmas Craft


We've been really busy getting things ready for Christmas, but there is always a little time to do a fun craft! Last week was a really bad week, just 1 bad day after the next. So for a little stress reliever, I decided to create some Christmas decorations that I spotted on Pinterest awhile back, which also inspired me to recreate the whole garland look shown over at The Good Stuff blog! Check it out!

joy glitter letters


I'm sure this is nothing new, but I thought it turned out too cute not to share with my readers!

So for this project you will need the following:
  • Cardboard (I used the flaps from a box that I no longer needed)
  • Letters (or stencils -- I printed out some letters on the computer, and cut them out)
  • Marker (for tracing letters)
  • Scissors or Utility Knife/Box Cutters
  • Modge Podge
  • Glitter (I used gold!)
It's was pretty simple for me to create, and the only thing that took some time was cutting out the cardboard letters. Other than that, it was easy peasy! Side note: You can use your Cricut or other die cut machine, but I didn't feel like dragging everything out and wasting good scrapbook paper to use as a stencil. You can also use paper instead of cardboard, but I wanted my letters to be a little more durable. This is just how I did it! :)
  1. Decide on how big you want your letters, type them up, print them out, and cut.
  2. Trace the cut out letters onto cardboard, and then cut out the cardboard letters.
  3. Slather the front of letters with Modge Podge, then sprinkle glitter onto letters and let dry.
  4. Decorate with them as you wish!
joy glitter letters
traced letters ready to be cut out
 
joy glitter letters
Love the Cabelas ad underneath?! Thanks to my hubs for letting me use that to catch all of that glitter!

I had everything I needed, so for me, this was a free craft!! Even better!! I had some extra cardboard box flaps, so I plan on making another set to possibly use outside for something fun to hang. I hope to do that sometime this week!

So have you been doing any crafting in the midst of the busy holiday season?! We are all done Christmas shopping, 3/4 of the gifts are wrapped, just waiting on the last to be delivered this week, and then I need to start on all of the baking!


Linking up too...