Showing posts with label Fall. Show all posts

Monday, September 22, 2014

{Gender Neutral} Fall Baby Shower

Last Fall (yes I know I waited too long) Ashley & I hosted a baby shower for my cousin's wife Jen! My cousin David found out what they were having, but Jen didn't want to know. I think that would be really hard for both of them, but neither caved.

gender neutral, fall baby shower, pumpkins, rustic shower, invitation
mock up of  cream baby shower invitations I created (not sure why it looks green)

gender neutral, fall baby shower, pumpkins, rustic shower, invitation, burlap
Burlap squares were glued on the back of the invites, giving them a little something.
They turned out perfect!! Sorry that this is the only photo of these, I deleted the actual photo of the invite.
I designed the invites myself, printed them at Vistaprint, and then glued burlap squares to the back. I did have to order bigger envelopes for them to fit into, so that was the only downfall. The invites stuck to the burlap just fine.They turned out just as we had imagined! We received so many compliments on them, and best of all Jen loved them!

While planning this baby shower, we decided we didn't really want to do the traditional pastel gender neutral store bought themed decorations. We wanted to tie into fall colors, keep it rustic, and make it Jen's "style". We had so much fun planning her shower with the help of Pinterest, it couldn't of gone better! We were bound & determined to keep this party to a minimal cost (compared to other showers we've done). We made things, we borrowed stuff, and used what we already had at home. I provided/made most of the decor, and Ashley made all of the food. Here is a run though of photo's from the shower, I hope you enjoy! Sorry, these are pics from my phone; I didn't have my nice cannon yet.

gender neutral, fall baby shower, pumpkins, rustic shower, burlap mason jars, twine
Table set up: Wood slice with burlap wrap mason jar adorned with orange rafia
tree limbs with "advice for the mom to be" cut out onesies
pint mason jars with babys breath
mini pumpkins as guest favors adorned with a "thank you" tag

gender neutral, fall baby shower, pumpkins, rustic shower, vintage suitcase, burlap mason jars, twine
gift table: vintage suitcases & vintage train case for the Cards
Vase with tree limbs, and pumpkins, burlap & lace table runner

gender neutral, fall baby shower, pumpkins, rustic shower, burlap mason jars, twine
drinks & meat table w/ Baby burlap banner

gender neutral, fall baby shower, pumpkins, rustic shower, cider punch, drink, burlap mason jars, twine
drinks: Tea, Water, and Apple Cider Punch
This Apple Cider Punch was delish, perfect for a fall shower or fall party!

gender neutral, fall baby shower, pumpkins, rustic shower, mason jar utensil holder, burlap mason jars, twine
Plates, napkins, forks (in mason jars of course), cups, fruit & veggie tray, & pickle rollups

gender neutral, fall baby shower, pumpkins, rustic shower, potato chips in paper bag
Individual potato chip servings in white paper bags, so fun!

gender neutral, fall baby shower, pumpkins, rustic shower, pumpkin cupcakes, vanilla cupcakes, burlap cupcake liners
Cupcakes: Pumpkin cupcakes adorned with a candy pumpkin, and Vanilla Cupcakes
I used a template to cut out the cupcake liners (sorry, I can't remember exactly what site, but google it and you'll find several)

gender neutral, fall baby shower, pumpkins, rustic shower, fall baby shower favors, mini pumpkin favors, twine
Guest Thank You favors: mini pumpkins!
gender neutral, fall baby shower, pumpkins, rustic shower
the mother to be and all her gifts!

gender neutral, fall baby shower, pumpkins, rustic shower
the mother to be

gender neutral, fall baby shower, pumpkins, rustic shower
us with Jen

gender neutral, fall baby shower, pumpkins, rustic shower, onesie cutouts
I cut out all of these by hand...omg it took forever!! We used these for advice for Jen

gender neutral, fall baby shower, pumpkins, rustic shower, baby shower chalkboard
baby shower chalkboard!

gender neutral, fall baby shower, pumpkins, rustic shower, vintage suit case card holder, burlap mason jars, twine
Vintage suitcases topped with a vintage train case for the cards


Last January 28th, Jen & David had a very healthy baby BOY!!! His name is Walker, and he is the cutest, chubbiest little thing I've ever seen. He weighed in close to a whopping 10lbs, just like his daddy when he was born.


© [Kayla] and [Small Town Lift], [2010-2014]. Unauthorized use and/or duplication of this material without express and written permission from this blog’s author and/or owner is strictly prohibited. Excerpts and links may be used, provided that full and clear credit is given to [Kayla] and [Small Town Life] with appropriate and specific direction to the original content.

Tuesday, February 18, 2014

Burlap Bubble Wreath makeover

Last year I made this bubble wreath at a wreath making class. I never really liked it, but I didn't want to just toss it. This last fall when I was in Hobby Lobby, I picked up some brown wire mesh ribbon, and some leopard print ribbon to update it. I finally got around to doing it this weekend, and I just love how it turned out! It's so me, and everything I love...burlap & leopard print! D and I think it would really neat with a fun cross or a monogram in the center. If I find one I like, stay tuned, I'll be updating it once again. But for now, I LOVE it! It will be a cute wreath to hang out for Fall and Winter, just an everyday wreath.

Here it is before...
before
 And here it is after...

after


So much better, don't ya think?!


© [Kayla] and [Small Town Lift], [2010-2014]. Unauthorized use and/or duplication of this material without express and written permission from this blog’s author and/or owner is strictly prohibited. Excerpts and links may be used, provided that full and clear credit is given to [Kayla] and [Small Town Life] with appropriate and specific direction to the original content.

Thursday, February 7, 2013

Pumpkin {Ice Cream} Pie

Are you a fan of Pumpkin Pie at Thanksgiving or Christmas? What about ice cream? What if I told you I had an amazing recipe for Pumpkin Ice Cream Pie?! Well keep reading my friends, because whether you're a Pumpkin Pie fan or not, you're going to want this recipe!

pumpkin ice cream pie


For Thanksgiving, D and I ventured up to Iowa to see his Grandma and Aunt that live there. We didn't have the traditional Thanksgiving Turkey, but we did have some amazing food. Then it was followed up by some scrumptious Pumpkin Ice Cream Pie his Grandma made. I was in LOOOOOVE, and I don't even like regular Pumpkin Pie! So much in fact after it was all gone, there was some of the melted good stuff in the bottom of the pan, that I HAD to spoon it out! It was THAT tasty! We all raved about it, and D doesn't like anything pumpkin, but he really liked this. So I had his Grandma mail me the recipe, it arrived about a week before Christmas. MERRY CHRISTMAS TO ME!!!


pumpkin ice cream pie
I love this pumpkin pie plate my grandma gave me, you've alse see it used with my Pumpkin Oreo Cheesecakes!


D and I had our very own Christmas this year the night before Christmas Eve. It was great, and especially because this would be our 1st Christmas as Mr. & Mrs.! We hung out together all day, lounging, prepping supper, and then cooking. We made steaks, baked potato, and fresh green beans for supper, and for dessert we had Pumpkin Ice Cream Pie!! Talk about an amazing meal all together!

pumpkin ice cream pie


Ingredients:
9in Graham Cracker Pie Crust (pre-made)
3/4 cup canned pumpkin
1/4 cup brown sugar
1/4 tsp salt
1/2 tsp ginger
1/2 tsp cinnamon
1/4 tsp nutmeg
1 quart vanilla ice cream, softened
1/4 cup pecans, chopped (optional)

Directions:
1. In a large bowl, combine pumpkin, brown sugar, salt, ginger, cinnamon, and nutmeg. If you want pecans added, this is when you'll add them in. Mix well.
2. Add slightly softened ice cream, mix well.
3. Spoon into graham cracker crust, and cover.
4. Freeze for 3-4 hours, or until ready to eat.
5. Remove from freezer 15 min before serving (it will make it easier to cut & eat).
6. Top with whipped cream if desired (this Cinnamon Whipped Cream would be perfect)


Well what do you think? I do know this will be a recipe that will be put in my "to make again" recipe file. And let me reassure you, that you're going to LOVE this recipe as well as your family!


You might also like my Snickers Ice Cream Pie! ;)


Linking up too...

Wednesday, November 21, 2012

Happy Thanksgiving!

Just wanted to post a quick HAPPY THANKSGIVING to all of you who actually take the time to read my blog! I know I haven't been the greatest at posting lately, we've just been on the go and I haven't had a whole lot of time.

We are off today to go visit D's grandma in Iowa who we haven't seen in 2 years, so it will be nice to see & spend some time with her. I talked D into going Black Friday shopping with me, or actually Thursday evening is when we'll head out after having our family time. I normally go with my Mom and Ashley, but this year I will be blessed with my hubby's help! :)
 
I hope you all have a very HAPPY THANKSGIVING, and be sure to eat lots of food and spend a lot of time with your families. And to everyone traveling and braving the crowds, be safe!!


Tuesday, November 22, 2011

{Ruffled-Bling} Give Thanks tile

I can't believe it...I can't believe how fast this year has flown by!  Seriously, Thanksgiving is in 2 days and I couldn't be more excited!  I love family time, I love the food, and I love the coziness that follows the gorging of all of that yummy food!  Thanksgiving is all about being Thankful, which I'm in the process of getting a post lined up for Thanksgiving that will share what I'm thankful for this year.  But in the meantime, I'm sharing with you my newest tile creation, one of which I wish I would've done awhile back so I could appreciate it longer.  That's ok, I still love it!  Sorry for the phone pictures!

Swoon.
I got out my Cricut and accessories, Inspired Heart cartridge, brown vinyl from Expressions Vinyl that I ordered a couple of weeks ago, a ceramic tile, and a really fun embellishment.  I cut out the "Give Thanks" quote at 4" using my Inspired Heart Cricut Lite cartridge that I got last year for Christmas on brown vinyl.  It was so pretty just as is, but then I added a rich brown ruffle blingy embellishment I found at Hobby Lobby on Saturday.  It was $4.99, plus I had a 40% off coupon, making it $2.99.  I used some hot glue to apply it under the "Give Thanks" quote on the tile. 

Love the shape of the word "thanks" and the richness of the vinyl!
 
Love this ruffle bling!! :)

Totally in Love!! :)

This project was very simple, and I love how it turned out.  Isn't it funny how the simple projects you create turn out to be some of your favorites?!
Linking up too...

Monday, October 31, 2011

HAPPY HALLOWEEN!!

Just wanted to wish ya'll a Happy Halloween!! Hope you get lots of treats and a few tricks!! :-)


Friday, October 28, 2011

Cinnamon Whipped Cream

Did you ever eat so much of something when you were a kid, because you LOVED it, that you honestly can't stand the taste of it now that you're older?  I actually have a couple of things: store bought whipped cream (in a tub or spray can) and baked beans to name a couple!  First off, the reason I hate whipped cream, is because I used to grab a tub of it and eat it right out of the tub.  That's how much I loved it.  I did it so often that I became really sick of it.  Now that I'm older, if we go out to eat or order something that has/might have whipped cream, I have to order it with out.  Just the slightest taste of it makes me want to gag.  As for the baked beans, I just loved them so much, one night I ate too many and I got really sick. 

When I spotted the recipe for Pumpkin Oreo Cheesecakes, the recipe said to top it off with whipped cream.  I really didn't like the sounds of that at all to be honest with you.  So I got onto Pinterest and searched for Cinnamon Whipped Cream.  I love Cinnamon, so I figured that would help me get over the flavor, plus it'll be homemade so it should taste a lot better than store bought.  I haven't ever made homemade whipped cream either, so I figured I'd give it a try.  I went with the recipe on Can You Stay For Dinner, which she also paired it with a pumpkin spice cheesecake (similar to the cheesecakes I made).  I liked that it only took a few ingredients, and maybe 10 minutes to make (give or take).  And guess what...when I tasted it, I was in awe that I actually liked it!!  It tastes nothing like store bought whipped cream, and I love the addition of Cinnamon...gives it a little "flair"!

Ingredients:
1 cup Heavy Whipping Cream
1/4 cup Confectioners Sugar (powdered sugar)
1/2 tsp Cinnamon
1/2 tsp Vanilla Extract

Ingredients

Beat heavy cream until it begins to thicken.


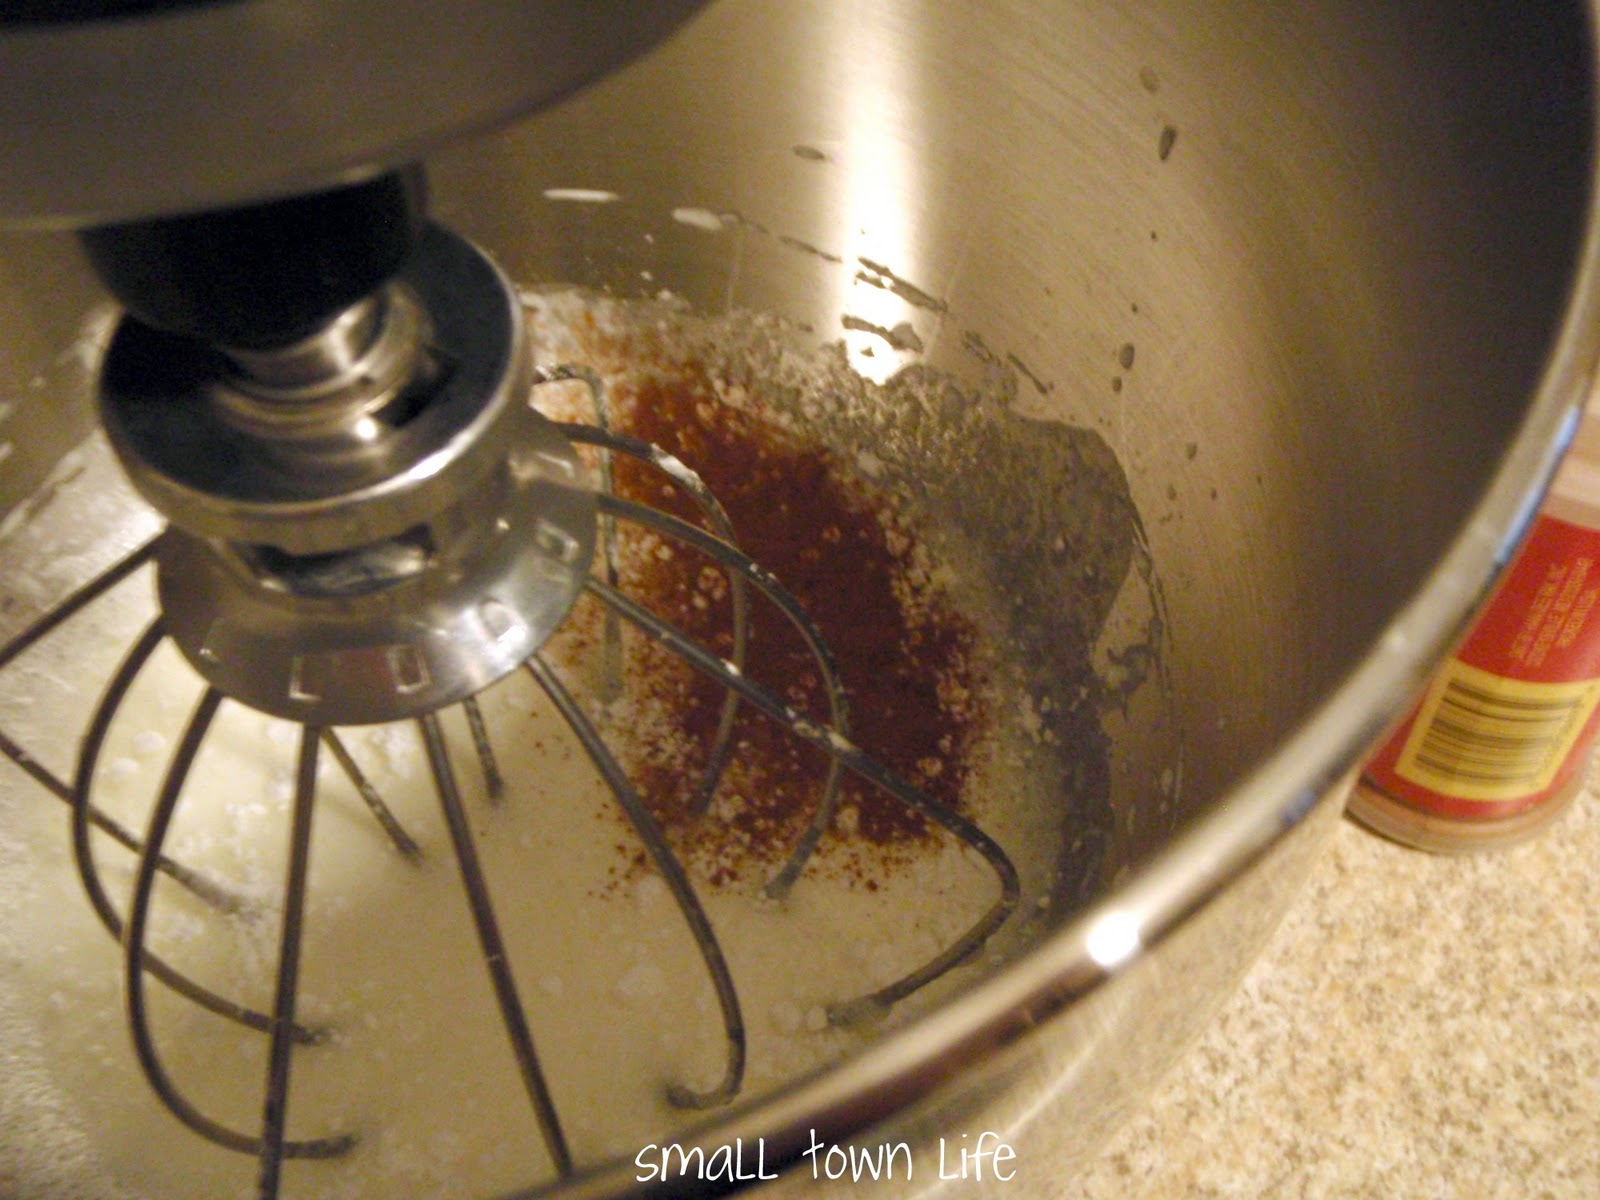
Slowly add sugar, cinnamon, and vanilla and continue to beat until stiff peaks form.

I didn't pipe it onto the Pumpkin Oreo Cheesecakes right away,
so I put it into a bowl, covered it with plastic wrap, and put it in the refrigerator. 
When I was ready to use it (the next day) I got out my mixer
and re-whipped it for a few seconds. 
It tasted and looked like I had just made it.

After I re-whipped it, I got out a pipe bag and decorating tip,
and swirled it on the cheesecakes!

The Cinnamon Whipped Cream was also a hit, and paired really well with the cheesecakes.  It would be great on some Apple Pie, Ice Cream, even cake!  I guess what they say is true...everything is better when it's homemade!!

Do you prefer homemade whipped cream over store bought?  Is there anything that you used to love that you can't stand now?  Let's hear it!!


Linking up too...

Thursday, October 27, 2011

Pumpkin Oreo Cheesecakes


My co-worker/good friend, Tracy, birthday was this last weekend; she's really good friends with my FMIL, and she always cooks up an amazing meal for our birthdays.  So when FMIL called to tell me what time to come over for Tracy's bday dinner, I suggest that I bring dessert. 

Tracy LOVES anything Pumpkin, last year I made her Chocolate Chip Pumpkin Muffins.  She really wanted those, but I told her that we needed to try something new!  I've been wanting to try these Pumpkin Oreo Cheesecakes that I spotted over at Inside BruCrew Life over a year ago...the time had come!!  Jocelyn is an amazing, inventive, and fun baker...check out her blog! ;) 

The recipe that she has on her blog makes 24 mini cheesecakes, but I didn't want to make that many...I don't think my jeans would be able to handle all of the extras, since there were only going to be 5-6 of us!  So I decided to cut the recipe in half, which is the recipe I am sharing with you today.  I also made a few spice additions, as well as made my own Cinnamon Whipped Cream topping.  I will be sharing that recipe with you tomorrow! ;)


Pumpkin Oreo Cheesecakes topped with Cinnamon Whipped Cream
I didn't have orange sprinkles, so I used yellow!

I must admit, I was a little scared to make these, because I haven't ever made Cheesecake before.  I always thought it would be a lot more difficult, so I just never wanted to give it a try.  So of course once they were baked, cooled, and topped with Cinnamon Whipped Cream, I just had to do a taste test.  I mean, who bakes something and doesn't try it before giving it to her guests?!  That's just wrong.  I had to make sure they were edible, and indeed they were!!  They turned out fantastic, I was so excited to take them to Tracy's bday dinner.  Let's just say in the end, they were a hit!

Yes, that is a Pumpkin Pie plate with "how-to" printed on it!
I love it, super cute! My Gma gave it to me.


Ingredients: Makes 12
1-8 oz pkg. cream cheese, softened
1/4 cup sugar
1 egg
1 tbsp. sour cream
1/2 tsp. vanilla
1/4 c. canned pumpkin (I'm made some muffins with the leftover pumpkin ;))
1/4 tsp. cinnamon
1/8 tsp. nutmeg
1/8 tsp. cloves
24 Oreos
Homemade Cinnamon Whipped Cream

1. Preheat oven to 350* Place cupcake liners in a muffin pan.

2. Beat the cream cheese until creamy.

3. Add the sugar and cream again.

4. Add the eggs one at a time beating after each one.

5. Add the rest of the ingredients and beat again.
This is where you'll add in the spices, they add great flavor!

6. Place one whole oreo in the bottom of the cupcake liners and fill up the liner 3/4 full with the cheesecake batter. Push another whole oreo into the top of the batter.

7. Bake for 20-22 minutes. Cool in pan for 15-20 min before removing and placing on a wire rack to finish cooling.

8. Keep refrigerated until ready to serve. Top with Cinnamon Whipped Cream right before serving.


These little Cheesecakes would be perfect for a Halloween Party and even Thanksgiving!!  What is your favorite thing to make with Pumpkin?  What about Cheesecakes?  Please share!


Linking up too...
At Home With Haley
It's A Blog Party
The Girl Creative
Today's Creative Blog
Not So Homemade
The Shabby Creek Cottage
What Allie's Making Now
Somewhat Simple
Lovely Crafty Home
Just a Girl
The Sisters of the Wild West
Polka Dots on Parade
This Chick Cooks
Ginger Snap Crafts
Homemaker on a Dime
My Favorite Finds
Mom's Crazy Cooking - This Weeks Cravings: Halloween
Thursday, October 13, 2011

Hearty Steak Soup

I love it when the weather starts to cool off at night.  I love that the leaves and everything is starting to change.  I love fall.  Though we are still enjoying the 70 & 80 degree weather (no complaining here), I like the cooler temps at night (so does my wallet!).  I could live with this type of weather year round, seriously!  In a nut shell, cooler temps to me means...comfort food, heartier soups, and hot chocolate (maybe even some Hot Chocolate Chip Cookies?!)!

I've been craving some type of vegetable beef, steak soup, beef and noodles type of dishes...which I'll be honest I'm not a vegetable soup kind of girl.  I started roaming through my Fix It & Forget It cookbook for some inspiration...I didn't have time to make it in the crock pot, because it was well past noon.  I found a Steak Soup recipe that looked like a great base, and then I added some additional ingredients.


This soup is hearty, it's beefy, and all around delicious...it will definitely warm you up inside if you need it!  You can add or take away anything you wish, but this is how I made it.

Ingredients:
1 lb stew beef
2 tbsp oil
5 beef bouillon cubes
5 cups water
2 cans diced tomatoes
1 can green beans, drained
1/2 onion, sliced
1/2 red bell pepper, sliced
1 zucchini, halved and sliced
3 large carrots (or approx 10-12 baby carrots), cut up (I cooked them in the microwave in some water for 2.5 minutes to help soften them up)
1 large russet potato, diced
2 garlic cloves, minced
Black Pepper and Salt to taste

1/2 cup flour
1/2 cup (1 stick) butter
1/2 tsp salt

Directions:
1. In a large pot, heat up 2tbsp of oil on medium heat.  Once its hot, add in your beef and season with your choice of seasonings (I used Black Pepper, Salt, Montreal Steak seasoning, and Garlic Salt).  You don't want to over cook it, just until it's brown.
2. In a medium pot bring to boil 5 cups of water, and then add in 5 beef bouillon cubes.  Once dissolved, set aside.
3.  After the beef is browned, add it into a large pot along with the following: beef broth, diced tomatoes, drained green beans, onion, red bell pepper, zucchini, carrots, potato, minced garlic, and salt & pepper to taste.  Cover with lid.  Reduce heat to medium-low, let it simmer for about 1 hour 1.5 hours, stirring occasionally.
4. Approximately 15-20 minutes before serving, you will need a medium pot to melt 1 stick of butter (I just used the same one from the beef broth).  Once it's melted, remove from heat.  Stir in flour to create a roux/paste, add in a little salt.
5. Add the roux/paste into the soup, stir until it's smooth.  Let it thicken for about 15 minutes.
6. Grab a bowl, fill it up, and devour!!


Notes: You can do this in the crock pot, the only thing you'll need to do is: follow steps 1-3 as stated above, but cook on low for 6-8 hours.  Approximately 1 hour before you eat, you'll want to add the roux/paste in made in step 4 and turn it on high.

I served this Steak Soup with some yummy homemade biscuits, which I will do a post on those later.  It was a perfect fall meal!


Linking up too...
At Home With Haley
It's A Blog Party
The Girl Creative
Today's Creative Blog
Not So Homemade
The Shabby Creek Cottage
What Allie's Making Now
Somewhat Simple
Lovely Crafty Home
Just a Girl
The Sisters of the Wild West
Polka Dots on Parade
This Chick Cooks
Ginger Snap Crafts
Homemaker on a Dime
My Favorite Finds