Sunday, December 23, 2012

Merry Christmas to You!

Merry Christmas to You!!
 
We didn't get around to sending out Christmas Cards this year,
but I did create one online really quick. I'm not sure where the time has went,
but I guess time sure does fly when you're having fun!!
 
D and I will be celebrating Our First Christmas as Mr. & Mrs. on tonight!
I plan on making us a delicious supper, having dessert, open presents, and watch a movie together!
 
Christmas Eve we will go over to D's parents in the afternoon to do Christmas with them,
and then it's off to his Grandparents for supper, gifts, games, and shenanigans!
 
Christmas Day, we will get up early in the morning and go to my family Christmas, Dad's in the morning/afternoon, and Grandparents/Mom late afternoon/evening.
 
'Tis the season to be busy and but always making time to spend it with Family!!
 
From our family to yours...
Have a Merry Christmas!!


Friday, December 21, 2012

2012 Burlap Christmas Tree

I've had our tree up for a couple of weeks now, but I just haven't gotten around to blogging about it. I finally took some pictures of it during the day, and at night (on my phone) so I could share it with you all.

burlap tree

This year I wanted something a little different. I was over the multi-colored lights that were on my tree that I have had for years. I was over the maroon & gold colors with tons of different ornaments. And I was over the tree skirt I've also had for several years. I wanted something new, but I couldn't justify spending money on another tree, when the one we had would suffice for the time being. I was going to sell it, but decided against it.

2011 Christmas Tree

What I wanted was a nicer looking faux tree, white lights, burlap ribbon, and pretty silver, gold, brown, and white ornaments. I also am in love with the ruffled tree skirts that sell on etsy for an easy $80, which I couldn't justify purchasing. I didn't mind buying a few ornaments, and some burlap ribbon, but the rest was out of the budget.
 
burlap tree
 
 
So this is what I ended up doing...using the tree we already had, but not plugging the multi-colored lights in. Adding a few strands of white lights that a friend gave me for free before the wedding, wrapping burlap/jute ribbon around it, using new & some old ornaments, and using a cream colored ruffled table skirt Ashley gave me last spring as the tree skirt! So the only thing I ended up having to purchase was some new ornaments (spent maybe $20, most from Hobby Lobby, a few from Target), and 4 rolls of burlap ($1.99 each on sale)!! I think it turned out pretty darn cute, and just the look I was going for (well, for the most part)!


The only thing I am missing is a tree topper, but I haven't found one that I absolutely love. I was going to make a large bow out of the burlap ribbon, but it's not wired and I'm not very good at making them. It doesn't look bad without it, I don't think.


And the improvised tree skirt, which is really a table cloth...I ABSOLUTELY LOVE IT!! Thank You Ashley if you're reading this!! :) You can't even tell it's not an acutal tree skirt. The table cloth itself only has 1 layer of ruffle, but I folded it in half and lined the ruffles up to make it look a little fuller. I got all of our presents wrapped and put under the tree, so you can barely see it now. Before I loaded it up I took a picture with just a few under it so you could see it!


Do you have all of your Christmas shopping done, and presents wrapped?


Linking up too...
It's A Blog Party
Today's Creative Blog
The Shabby Chic Cottage
Somewhat Simple
Lovely Crafty Home
Polka Dots on Parade
Ginger Snap Crafts
Six Sisters Stuff
Semi Homemade Mom

Wednesday, December 19, 2012

Glitter Clothespins - Christmas Craft

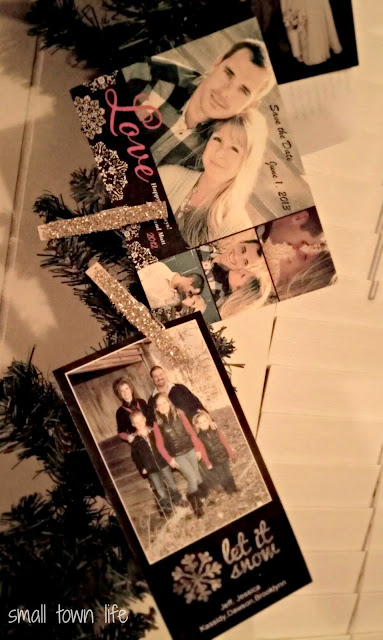
Did you see how I held my JOY Cardboard Christmas Letters up? I used these gold glitter clothespins, which are also holding our Christmas Cards onto the garland. I just love this idea, and they are so easy to make! I'm sure this one is also an "already known how-to", but again I couldn't resist sharing with you all!


For this easy project, you will need:
  • plain wooden clothespins
  • modge podge
  • glitter (I used gold)
The only thing you need to do is cover the top part of the clothespin with modge podge, sprinkle on your glitter, and let it dry! It is as simple as that! I think it took me maybe 10 minutes to do 24 of them, if that. These are something you can use to display artwork, pin gift tags onto your gifts, hold up your Christmas Cards onto garland (or even twine), etc. It's the little details that can really dress things up a bit!

clothespin cardholders

As for my JOY letters, I'm not 100% sure I will keep them where they are. I am thinking of putting my burlap bubble wreath in the center of the windows, and putting the JOY letters somewhere else. Maybe at the top of the windows, or stringing them across our mirror. I'm going to play around with it, and see which I like best!


Linking up too...
It's A Blog Party
Today's Creative Blog
The Shabby Chic Cottage

Tuesday, December 18, 2012

JOY - Cardboard Christmas Craft


We've been really busy getting things ready for Christmas, but there is always a little time to do a fun craft! Last week was a really bad week, just 1 bad day after the next. So for a little stress reliever, I decided to create some Christmas decorations that I spotted on Pinterest awhile back, which also inspired me to recreate the whole garland look shown over at The Good Stuff blog! Check it out!

joy glitter letters


I'm sure this is nothing new, but I thought it turned out too cute not to share with my readers!

So for this project you will need the following:
  • Cardboard (I used the flaps from a box that I no longer needed)
  • Letters (or stencils -- I printed out some letters on the computer, and cut them out)
  • Marker (for tracing letters)
  • Scissors or Utility Knife/Box Cutters
  • Modge Podge
  • Glitter (I used gold!)
It's was pretty simple for me to create, and the only thing that took some time was cutting out the cardboard letters. Other than that, it was easy peasy! Side note: You can use your Cricut or other die cut machine, but I didn't feel like dragging everything out and wasting good scrapbook paper to use as a stencil. You can also use paper instead of cardboard, but I wanted my letters to be a little more durable. This is just how I did it! :)
  1. Decide on how big you want your letters, type them up, print them out, and cut.
  2. Trace the cut out letters onto cardboard, and then cut out the cardboard letters.
  3. Slather the front of letters with Modge Podge, then sprinkle glitter onto letters and let dry.
  4. Decorate with them as you wish!
joy glitter letters
traced letters ready to be cut out
 
joy glitter letters
Love the Cabelas ad underneath?! Thanks to my hubs for letting me use that to catch all of that glitter!

I had everything I needed, so for me, this was a free craft!! Even better!! I had some extra cardboard box flaps, so I plan on making another set to possibly use outside for something fun to hang. I hope to do that sometime this week!

So have you been doing any crafting in the midst of the busy holiday season?! We are all done Christmas shopping, 3/4 of the gifts are wrapped, just waiting on the last to be delivered this week, and then I need to start on all of the baking!


Linking up too...

Monday, November 26, 2012

Expressions Vinyl Super Secret Coupon #1 {& vinyl project ideas}


IT'S HERE, IT'S HERE!!!
**************
The first Super Secret Coupon code for Expressions Vinyl has been released.
This code will only be good through November 28th,
and it is good for 25% off your entire order!
 
Expressions Vinyl only does this coupon once a year,
and what a perfect time for them to release it!
 
 
Remember, they have a bunch of colors to choose from!
They also have indoor/outdoor, glow in the dark, reflective, patterend, and much much more!
Just use coupon code: SANTA - good for 25% off your entire order.
That's right 25% off!!!!!!
 
So hurry on over to Expressions Vinyl for all of your holiday vinyl project needs!


Here are some projects that I have created using vinyl (not all just some of my fav's):
  

Dressing up a Hobby Lobby Christmas Sign
Winter Subway Art Tile
Nativity Scene Tile
Before & After Mug Shot labels
thanksgiving tile with vinyl
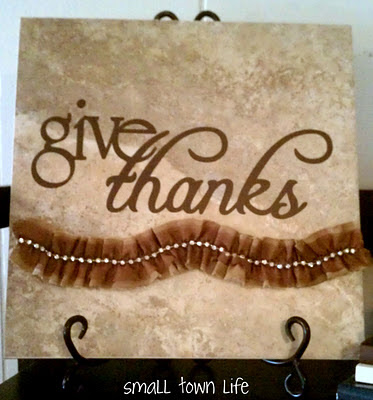
Give Thanks Tile
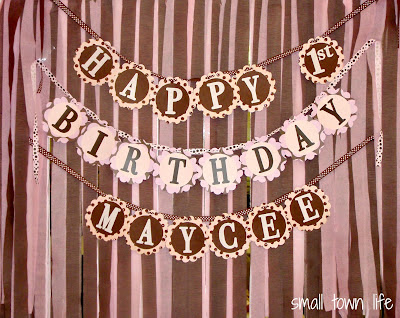
Scalloped Birthday Banner
{Grand}Father Tile
Baby Subway Art Tile

Wednesday, November 21, 2012

Happy Thanksgiving!

Just wanted to post a quick HAPPY THANKSGIVING to all of you who actually take the time to read my blog! I know I haven't been the greatest at posting lately, we've just been on the go and I haven't had a whole lot of time.

We are off today to go visit D's grandma in Iowa who we haven't seen in 2 years, so it will be nice to see & spend some time with her. I talked D into going Black Friday shopping with me, or actually Thursday evening is when we'll head out after having our family time. I normally go with my Mom and Ashley, but this year I will be blessed with my hubby's help! :)
 
I hope you all have a very HAPPY THANKSGIVING, and be sure to eat lots of food and spend a lot of time with your families. And to everyone traveling and braving the crowds, be safe!!


Thursday, November 1, 2012

DIY Wedding {Rehearsal} Bouquet

Aimee & Ryan's wedding is finally this Saturday {November 3rd}, and I CAN NOT wait! We are headed out of town this afternoon for a long weekend, to help prepare and celebrate their big day. Such an exciting time for them!

As most of you know, it's tradition that the MOH takes the ribbons & bows from the bridal shower and create a rehearsal bouquet. I had every intention of getting all of those bows & ribbons before leaving town from her bridal shower, and somehow I didn't end up with them. Not only did I not have them, there weren't many bows to begin with so it would've been hard to create a practice bouquet. So onto Plan B.


Remember those Tulle Poms on a stick I made for the shower? Turns out that was going to make the perfect Plan B Rehearsal Bouquet! I put them together with a couple toilet paper rolls, some tape, and ribbon and it became the prettiest rehearsal bouquet ever! This is something she will be able to keep and display for a very long time, next to her actual bouquet for the wedding!  Best part is, since I already had everything on hand, except the ribbon, it was very inexpensive since I reused the tulle poms from her shower. I think the ribbon was on sale for $1.50...score! Here is how I did it (sorry for the grainy pics, I took them with my phone)...


Needed: Tulle poms on a wooden dowel, tape (I used electrical, can use whatever you have), toilet paper rolls (so the "stem" is smooth), hot glue (not shown), and ribbon (not shown)

Step 1: Bunch the tulle poms, and tape the dowels together in 2 places to make sure they are secure.
Step 2: Cut toilet paper roll in half (I used 2)
Step 3. Wrap toilet paper roll around dowels until snug, and tape seams together.


Step 4: Cut a piece of ribbon and hot glue it to the end of the dowels/tp roll
Step 5: Starting at the top, wrap your favorite ribbon around the base and hot glue at the end (not shown)


I think it turned out so pretty, and I just LOVE all of the glitz it has! If you're wondering where I got the glitter tuller, read more here.


Linking up too...

Wednesday, October 24, 2012

Aimee's Bachelorette Party

I once again have been slacking, but I swear I've been busy!! :) My last post was a few weeks ago, I've had such a great response from it, Peanut Butter Twists! If you haven't checked that post out, be sure too...they are deeelish! Anyways, back to the post...our friends got married out of town this past weekend, the weekend before that I did stuff around the house, and the weekend of Oct 6th was Aimee & Ryan's bachelor/bachelorette parties.

As you know I am her Matron of Honor, and couldn't be more excited for her! Her wedding is in 2 weeks (November 3rd), and I already can't wait to share those pics after.

Invite front

Invite back
I designed her invites on picmonkey.com, and loved how they turned out. I had VistaPrint print them out for us, as well as a lawn sign & Thank You notes for her to send out after the party.
LtoR: Aimee & her Mom, Aimee with her Bridesmaids, and Aimee & I
For her bachelorette party, we met at one of the other BM's house, had pizza, drinks, and played a panty guessing game! The idea came from pinterest via Healthy Tipping Point, she had played the game at her friends bachelorette party. You ask each guest to bring a pair of new panties, unwrapped, that best represents them, and then the bride has to guess who brought each one. It was a huge success, and needless to say Aimee has lots of pretty panties to choose from now! ;)
Aimee & a few of her new panties! ;)
We also took before & after mug shots...well just Aimee & I on the afters, since we forgot to capture the other 4 girls before going home. I created little signs with my Cricut, using bright pink scrapbook paper, and black vinyl. I used the Cherry Limeade cartridge for the font. I spotted this idea on pinterest via Breezejoy, and thought it was such a fun idea!


Aimee still looks good, but me...I look like a hot mess! LOL
After the "pre-party" we hit the town, sharing a party bus with the guys, but only for a few minutes. We got dropped off at Power & Light, and danced the night away! We had such a fun time, and here are some pictures to recap the night!

Party action on the Party Bus!

Party action at P&L (and a couple from the party bus)
Hope you come back and check out her wedding pictures after November 3rd! And let me know if you'd like a tutorial on how I made her bachelorette invites with picmonkey, I will recreate them since I forgot to take screen shots while I was making them.


Linking up too...

Tuesday, October 9, 2012

Peanut Butter Twists


One of my favorite rolls that our school would serve with our lunches was a Peanut Butter Twist! They were so good, and I can honestly say I haven't had one since 2004. I've always wondered how they made them, but there really aren't too many recipes out on the internet that I could find. Last year, a girl that I used to go to school with was wanting a recipe on facebook, I immediately tuned in. Someone posted a recipe shortly after she requested it, and I was sure to copy the recipe down myself.

Me & Tracy (the other secretary here at work), we like to bring in a treat for the guys' birthdays. Last week Thursday it was my turn to bring something, so I decided I would give these yummy Peanut Butter Twists a try! I haven't ever made them before, so I wasn't sure how they would turn out. Below is how I made them, using the recipe that was posted on facebook and combining it with the recipe I found over at Taste of Home. They turned out amazing, and let me tell you...the peanut butter filling was so good, I kept eating it with a spoon. So.addicting. This is a keeper and I can't wait to make them again!


Peanut Butter Twists (adapted from a friend & Taste of Home)
Dough Ingredients:
1 box Hot Roll Mix
1 cup hot water (120*-130*F or hottest tap water)
2tbsp Butter, softened
1 Egg

PB Filling Ingredients:
2 cups creamy Peanut Butter
1 stick Butter, softened
1 cup Sugar
1 tbsp Cinnamon

Glaze Ingredients:
1.5-2 cups Powdered Sugar
5 tbsp warm Water
3 tbsp Peanut Butter Filling


Directions:
1. Using a mixer & dough hook, prepare dough as directed on Hot Roll Mix box.
2. Let rise 1 time for 10 minutes, flour counter top, and roll dough out into a rectangle.
3. Using a mixer, mix together the ingredients for the PB Filling.
4. Spread PB filling over dough, leaving approx 1/2" around edges.
5. Fold dough in half, and cut into 1"-2" wide strips.
6. Twist strips 3 times, and lay flat onto a parchment covered cookie sheet (or spray with cooking spray).
7. Bake at 350* for 15-20, until golden brown.
8. Remove from oven, let cool on pan for a few minutes, then transfer over to wire cooling rack and let cool completely.
9. Mix up powdered sugar glaze mixture, and drizzle over top of PB Twists.

Notes: This recipe will make 12-14 twists (or a few more) depending on how big you cut them. Next time I make them, I will cut the filling recipe in half. There was a bunch leftover that I had to throw out or I would've gotten sick from eating it all with a spoon! Or make 2 batches of dough. The glaze was a little too thin, next time use less water, or even try it with milk.


What was your favorite meal/snack to eat at school?


Wednesday, September 26, 2012

Easy Minestrone Soup


Fall is on the horizon, and soup has been sounding so good! The other night I wanted something that was light, but also hearty with vegetables.  I've never made Minestrone soup, but I thought it sounded really good. So off to Google I went and found this 30 min recipe from Taste Of Home (click for the original recipe), it sounded perfect to me! Of course I didn't have every single ingredient, so I adjusted it to my likings and what we had on hand. I didn't put any meat in it, and D actually loved it! So this my friends is a keeper recipe, and I can't wait to make it again. I also made a batch of simple biscuits to go with it. Yummm!

Here is the definition of Minestrone Soup from wikipedia:
Minestrone (literally big soup) is a thick soup of Italian origin made with vegetables, often with the addition of pasta or rice. Common ingredients include beans, onions, celery, carrots, stock, and tomatoes.
 
The great thing about Minestrone soup is you can adapt it to your likings, and even make it completely vegetarian by using Vegetable Stock/Broth instead of Beef.

Easy Minestrone Soup - (adapted from Taste of Home)
serves approx 6
Ingredients:
2 medium carrots, chopped
1 small onion, chopped
2 garlic cloves, minced
3 teaspoons canola oil
5 1/2 cups water
4 beef bouillon cubes
1 can (14-1/2 ounces) diced tomatoes, undrained
1 can green beans
1 can dark red kidney beans
2/3 cup cooked elbow macaroni or favorite pasta (I used spiral)
Salt & Pepper to taste (be generous with both)
Italian Seasoning to taste
Shredded Italian Cheese (optional)
 
Directions:
1. In a large saucepan, saute carrots, onions, and garlic in canola oil for 5 minutes.
2. Add in the remaining ingredients, except for the pasta: Water, Beef Bouillon cubes, Diced Tomatoes, Green Beans, and Kidney Beans.
3. Bring to a boil, and reduce heat and simmer uncovered for 25-30 minutes until vegetables are soft.
4. In the meantime boil noodles until al dente.
5. Add in noodles, salt, pepper, and italian seasoning (to taste).
6. Pour some in a bowl, sprinkle with some italian cheese blend (optional), and enjoy!
 
This soup was just as good the next day as it was fresh! You can see from the original recipe that I had to add in more water & bouillon cubes. There wasn't enough liquid for it to be a soup.
 
Are you ready for fall, and for all of the yummy food that it brings? I can't wait!


Friday, September 14, 2012

Aimee's Bridal Shower Recap

Aimee's shower was last weekend, as you noticed from the last 2 posts that had some of the decoration details.  Here is a snapshot of the invitations I created on Vistaprint...

I think they turned out really cute, and stayed within the theme of Purple, Silver, & Damask Print. Aimee loved how they turned out!! And Vistaprint is always have super bargains, so we got them pretty cheap too!

Here are some pictures from Aimee's Bridal Shower....


Welcome Chalkboard
Instead of a Guest Book, we had the guests leave some Marriage Advice
for Aimee or well wishes. I going to put them in a little mini scrapbook
album and give it to her for her to keep.
The Bride with her Bridesmaids
Melanie, Tasha, Aimee (the bride), Me, Michelle, and Julia

The Bride & her Mom

The Bride & flower girl Ella

Matron of Honor (me) & The Bride!


Aimee reading each wine bottle. Us Bridesmaids created & gave her a wine occasion gift basket.
This was spotted on Pinterest with a thanks to Occasionsonline.com.
The link posted has a free printable so you can create your own!
 
All of us again, with the cute basket! She loved it!!

Her Mom, Aimee, and Future Mother-in-Law


Eiffel Tower Centerpiece


Pretty cupcakes 


Drink & Cupcake Set up with Miss to Mrs Banner


Overall the shower went really well! Aimee got a lot of great gifts from her registry, and some personalized ones as well. We didn't play any games, as requested by the bride (we aren't a fan of them either!), but we did go around the room and introduce ourselves and say how we knew Aimee. It was nice for me, because I only knew the bridesmaids, and a couple other people in the room. It was nice to finally put names to faces.  We are now getting ready for the bachelorette party which is October 6th, except we aren't doing any fancy decor. However, I was in charge of creating the invitations, which should arrive any day.  I am so excited to show those to you!