
 |
| Her bedding - Source |
I wanted these letters to be girly, shabby-chic, and something Danielle could hang up on the wall. In the end, it turned out everything I hoped for and more! Are you ready for this?!?
 |
| Supplies: Chip Board Letters, Spray Paint, Scrapbook Paper, Modge Podge, Distressed Ink, Cute Buttons, Ribbon, Sanding block/paper, Glue Gun |
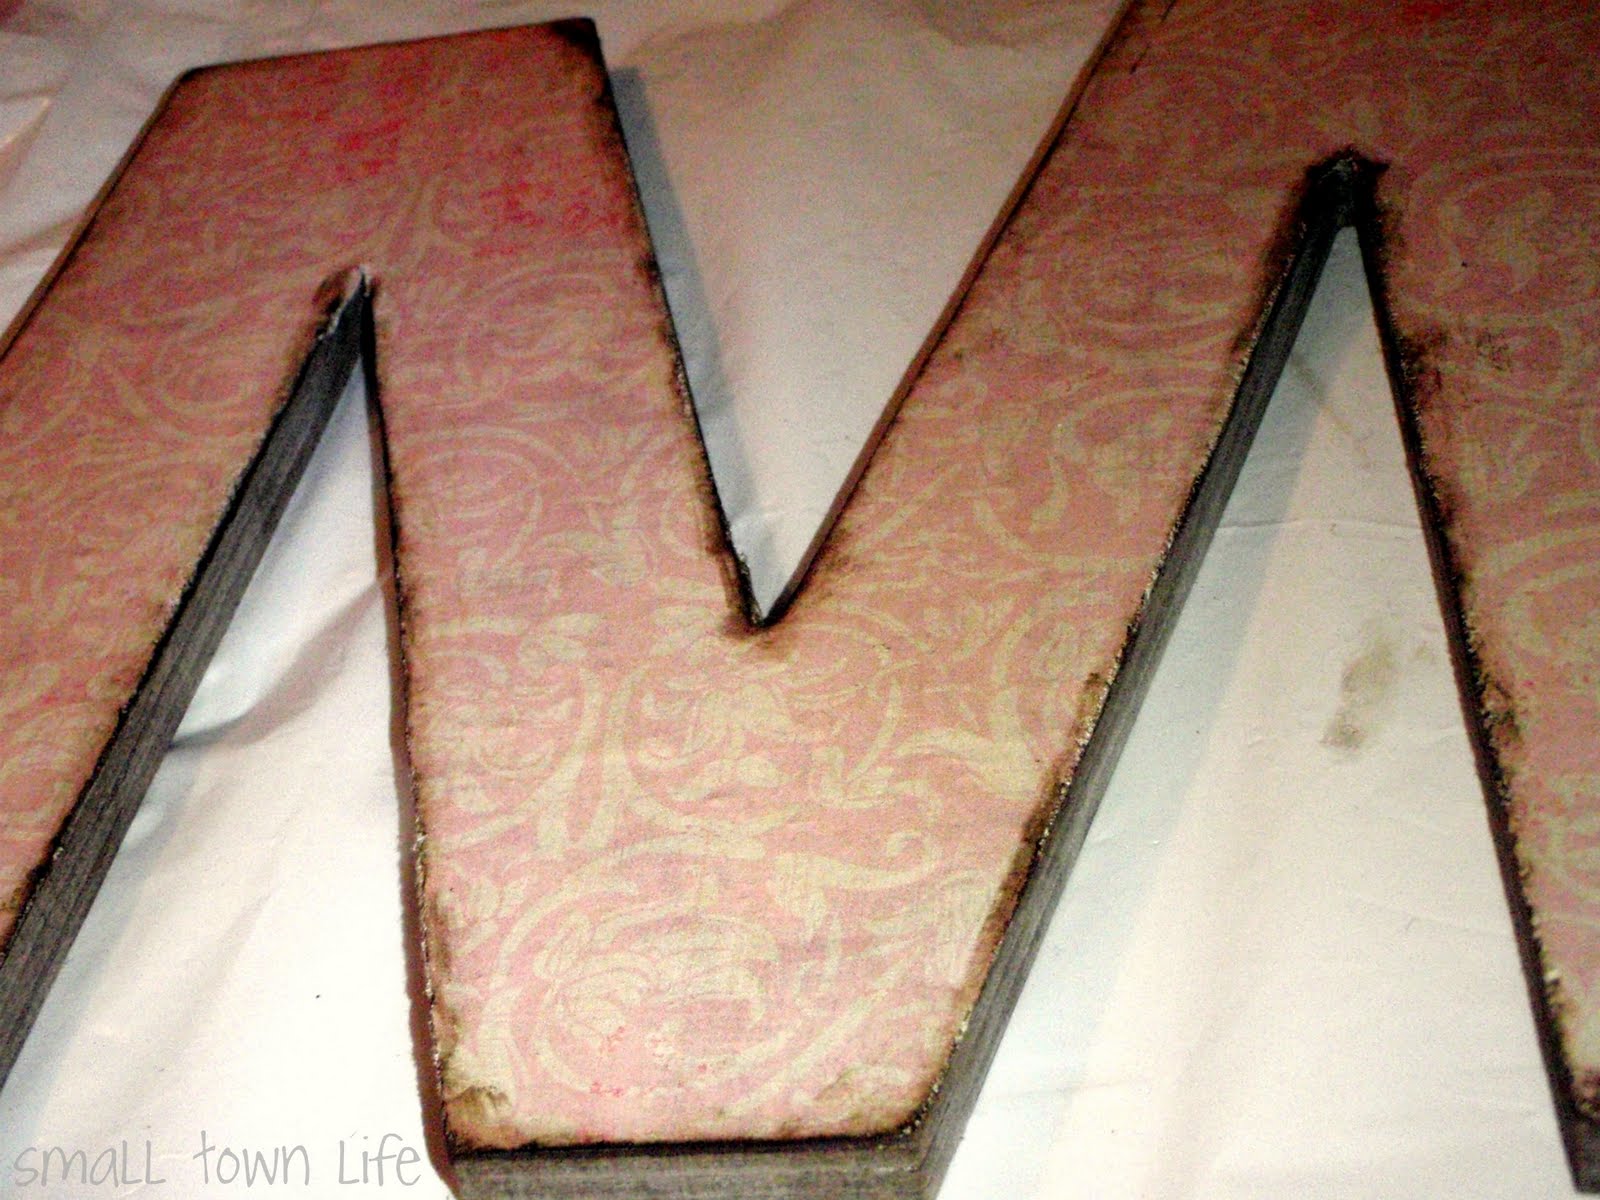
First I spray painted the front and back of the letters using Krylon Leather Brown. The letters kind of soaked up the paint, so I went over each one a couple of times. It didn't have to be perfect since I was modge podging scrapbook paper on the front. I let the letters dry on a trash bag for 24 hours.
 |
| Spray Painted letters Leather Brown, front and back |
After the letters were dry, I traced the letters onto the back of my scrapbook paper (turned the letters accordingly), and cut them out. I traced them a little bigger than their actual size just to make sure they would fit properly, and then I could sand off the excess paper. I then took the cut out letters, smothered some Modge Podge on the Chip board and stuck the paper on top. I repeated until each letter was on.
 |
| Covered front of letter with Modge Podge with a tiny sponge |
 |
| Placed scrapbook paper on top (notice the excess paper on the edges) |
Next I took a block sander and sanded the excess paper off of the edges. Again it didn't have to be perfect, but I made sure to be close to the edges on the chip board.
 |
| I sanded down the excess paper on all of the edges (notice how rough it looks!) |
After sanding all of the letters, I took some Distressed Ink in Vintage Walnut and rubbed it on the sides of the letters, and randomly made spots on the letters. This gave it the shabby-chic/vintage look I was going for! I was already swooning over the letters by this point and they weren't even done! ;)
 |
| Rubbed some Distressed Ink in Vintage Walnut on the edges to make it look more vintage |
Almost done...I slathered 2 more coats of Modge Podge on the letters to make sure everything was good and sealed. I even put some on the sides of the letters so it blended in better.
 |
| Smothered with another 2 coats of Modge Podge, put on the sides also |
Last I took some really cute buttons (they also reminded me of something vintage/shabby-chic) and hot glued them on each letter. I just love how it turned out!!!
 |
| Hot glued some cute buttons on the letters! |
I could've stopped there, but I wanted the letters to be able to be hung on the wall. So I took some dark brown glittery ribbon and hot glued it to the back of the letters, creating a loop. Viola!
 |
| Hot glued ribbon to make a loop |
Well...what do you think?! I seriously love it!!! I told you that I was swooning over my own projects, and when Danielle opened them she fell in love!!! I gave them to her before her baby shower as a little something extra! She couldn't believe that I made them! I hate that I didn't have something to hang them on, so taking them on the floor is the only option I had...oops!
 |
| All finished, ready to be hung in Maycee's nursery!!! Don't you just love it?! Go ahead...click on the picture to make it bigger!! |
 |
| B-E-A-UTIFUL!!! |
Linking up too...
At Home With Haley
It's A Blog Party
The Girl Creative
Today's Creative Blog
The Shabby Chic Cottage
What Allie's Making Now
Somewhat Simple
Paisley's Passions
Lovely Crafty Home
Just a Girl
The Sisters of the Wild West
Polka Dots on Parade
You did excellent! I love the distressed touch. Thanks for linking up!
ReplyDeleteAHHH!!! I love these! I'm so proud of your DIY-ness. Seriously...some day FAR down the road, I'll be ordering some of these from you! Yes, I could make them myself...but you did such a great job, why bother? ;)
ReplyDeleteThese are seriously fabulous! I love it! Would love to have you at my Link Up Party!!
ReplyDeletehttp://menmythriftyideas.blogspot.com/2011/05/three-item-thursday-link-party_12.html