Friday, December 31, 2010

Happy New Year!!

WOW...I seriously can't believe that today is the end of 2010, and tomorrow will be the start of 2011.  Where has all of the time went this year?!  It's kind of bittersweet, ya know...sad to see it go, but at the same time I'm ready for an awesome new year!

I wanted to share briefly some my favorite moments were that took place in our lives in 2010 before I start talking about my "goals" and/or "resolutions" for 2011.  Here is to a great 2010...
  • D and I enjoyed a wonderful vacay in Miami Beach, FL at the beginning of March (loved it there, want to go back!)
  • We broke news to our family, friends, and co-workers that we were leaving the {big} city to start our new lives in a {small} town at the end of March.
  • D and I were able to see George Strait in concert again...3 years, 1 month, and 4 days (or something around there) since we had very first met! :)
  • In May we purchased our very {first} home!  (Sweat equity was very rewarding for us...it took a whole month straight of sweat, tears, and muscles so we could move in)
  • We finally moved in to our {new} house July 4th weekend!
  • Several of our friends were married over the summer and fall, and we tried to make it to as many as we could...(Congrats to you all if you're reading this!)
  • I started my very first blog!
  • We had our Housewarming Party!
  • We went to the Chiefs game!
  • D joined the volunteer Fire Department
  • I went on a Girls Trip and saw Lady A and David Nail in concert!
  • Went to Iowa for Thanksgiving to see D's Grandma Eudy
  • Last but not least...we had an amazing Christmas!
I'm off work until next Tuesday...we are back in the {big} city to spend NYE with my Mom, and our good friends!  We are going to dinner and to a band, it should be a great night/weekend!
Here were are last NYE!

So on to my "goals" and "resolutions" for 2011...
  • Try to be more patient with everyone (this is a big one for me!)
  • Spend more time serving the Lord and our community (haven't done much of that since we moved, so I would really like to get back into that)
  • Start up an exercise plan and stick with it (I'm really excited for this, and can't wait to start Zumba for the PS3 Move...and if any of you know me, I DON'T like to exercise!)
  • Spend more time with family (we already do this, but sometimes it can be challenging since we don't all live in the same town...this includes everyone from cousins to aunts & uncles)

Well that's all I have for now...I hope ya'll have a fun and safe New Years...

SEE YA NEXT YEAR!! :)

Thursday, December 30, 2010

Crafty Recipe Binder

You've heard me mention a project I was working on before Christmas, and it was for my brothers girlfriend Ashley.  I made her a Recipe Binder, and it actually turned out pretty neat!  I can't wait to make myself one, but I will probably wait awhile before doing so.

I didn't take pictures while putting everything together, but I did take some after shots (well Ashley took them for me and sent them to me).  I found some inspiration here and here.  If Ashley is anything like me (which we are WAY too much alike, it's scary) then she has tons of random recipes that she's printed off from various blogs and internet sites that are flying around her kitchen.  When I asked her for her Christmas list she mentioned she wanted a binder to hold all of her randoms in...I knew exactly what I wanted to do!  Off to Hobby Lobby (a few times actually), then to the grinding stone I went, working until I got it done (the night before Christmas Eve)!

Love it!
 Some things you'll need:
  • 3 Ring Binder (I used 2")
  • Page Protectors
  • Your choice of 8.5x11" Scrapbook Paper for the different categories (6-12 sheets, 12 if you want a design on the backside and want to cover up the bar code on the back)
  • Your choice of 12x12 Card stock Scrapbook Paper (I had 2 matching used for the front and back, and one solid to fill in the side/spine of the binder)
  • Fun Scrapbook Embellishments (to go with your "theme" - cooking, kitchen, etc...)
  • Card stock Pad (assorted colors to match your color scheme...I used the kind that were sticky on the back and didn't have to worry about getting glue everywhere)
  • Scissors (Regular and Fun!)
  • Recipes to fill it (if it's for a gift, put 1 recipe that goes along with each section...it's a nice surprise!)
  • And whatever else your little heart desires (like making a scrapbook)!
  • 
    Front of the Binder
    (sticker says "Creating Traditions in the Kitchen")
     
    Appetizers & Beverages section
    (great section for party recipes: finger foods, spiked/regular punch, etc...)
    
    Soups & Salads section
    (great for any kind of fruit/lettuce salads, and any yummy soups,
    like this Chicken Taco Soup!)
     
    Veggies & Sides
    (great for any cooked veggies and any other sides)
     
    Main Dish secion
    (sticker says "Cooking as easy as 1..2..3)
    (great for all of your main course meals, including crock pot meals like
    this Hearty Round Steak Casserole!)
     
    Rolls & Bread secion
    (great for any homemade rolls and bread,
    like these yummy Chocolate Chip Pumpkin Muffins)
    
    Dessert secion
    (saved the best for last!! put any and all of your sweet treat recipes here,
    like these Peanut Butter Bars)
    
In the inside of the Binder, I created a Velcro Recipe holder for her random recipe cards that people have given her.  I found this idea here over at The Girl Creative (love her stuff, check it out!).


After I finished it all up, I had some other things to go with it and put it in a basket, and put a pretty bow on it.  She.Loved.It.

All wrapped up and ready to go!


Linking up with...
Somewhat Simple
Today’s Creative Blog
The Shabby Chic Cottage
What Allie’s Making Now
It’s a Blog Party

Wednesday, December 29, 2010

Our Christmas!

I hope you all had a very Merry Christmas this year!!!

D and I had such a wonderful Christmas all around...we ate some awesome food (lots of it), got some neat gifts, and best thing of all was that we got to spend time with our families!  There is a lot of planning and preparation for Christmas, but it is so worth it in the end!

Christmas Eve (afternoon) we went to D's parents house and opened gifts, and then for supper we went to his Grandparents house.  We ate, told stories, laughed, opened gifts, and laughed some more!  We were so tired by the time we got home, but knew in 6 hours we had to get up and get ready to go to my families.  Christmas Day we went to my Dad's for lunch, which I think will be a new tradition for us.  We all brought something to share for lunch, ate, laughed, opened gifts, and laughed some more!  That afternoon we went to my other Grandparents house, which is where my Mom was.  We opened gifts, laughed, told stories, ate supper, and laughed even more at the guys shooting eachother with Nerf guns!  Later on that night, we went back to Brett and Ashley's house; my cousin and her hubby from Washington came over...the night consisted of catching up, wine, beer, Boxer or Briefs, laughing hysterically, singing "going to Utah...going to Utah" (while doing an awkward robot dance), and shot gunnin' beers!  (Most of it ended up on the floor, but that didn't matter...we had a BLAST!)  I haven't seen them since their wedding which was over a year ago, and before that it had been a few.  So by the time we were all finished with Christmas, all of our faces and stomachs hurt from laughing so much! 

Here are a few snapshots from Christmas at my Dad's house...I didn't think to take any other pictures (which I wish I would have now) at our other Christmas celebrations.

Bernie and Grandpa Dave

Bernie chewing on his new bone from Grandpa Mark (my dad!)
 
Ashley, Me, and sis-inlaw Kelli (she thinks she's a jokster!)
Yes, Ashley surprised both Kelli and I with our very own Ugly Christmas Sweater!
I have one, but couldn't find it...no biggie, Ashley was to the rescue!
Oh and this should totally be our Christmas Card next year :)

I can see it already!

Grandma Jean and Grandpa Dave
 
Bernie and my love!
 
Bernie waiting so patiently for us to give him his bone back!

Here are some pictures from the end of the night....

Alicia and her hubby Jake
(go check out her blog - hilarious!)
 
Me and Jake

Alicia and I
(apparently something was really funny?)

No explanation needed.


I LOVE my family!!

Thursday, December 23, 2010

More Christmas goodies - Chocolate Caramel Nut Bars

Last night I was busy!  Not only did I wrap all of D's presents and other remaining gifts, but I also I baked a homemade pizza, Cinnamon Roasted Almonds, and last but not least...CHOCOLATE-CARAMEL NUT BARS!  Just looking at the recipe over at Kraft.com made me want these bad boys, so I added them to my Christmas goodies list!  They kind of remind me of Toffee; mmmmm they are good!

Ingredients:
1 cup (2 sticks) butter, softened
1/2 cup firmly packed brown sugar
2 cups flour
1/4 tsp. salt
1 pkg. (12 oz.) BAKER'S Semi-Sweet Chocolate Chunks (I used the squares and chopped them up) 
1 bag (14 oz.) KRAFT Caramels (about 50)
1/4 cup whipping cream
1 cup chopped Walnut Pieces

Directions:
PREHEAT oven to 350°F. Line 15x10x1-inch baking pan with aluminum foil, with ends of foil extending over sides of pan. Grease foil. Beat butter and sugar in large bowl with electric mixer on medium speed until light and fluffy. Add flour and salt; beat on low speed until crumbly. Press firmly into prepared pan.

BAKE 15 min. or until edges are golden brown; sprinkle with chocolate chunks. Cover with foil. Let stand 5 min. or until chocolate is melted; spread evenly over crust. Refrigerate 15 min. or until set.


MICROWAVE caramels and cream in microwaveable bowl on HIGH 2 min. or until caramels begin to melt; stir until caramels are completely melted. Gently spread over chocolate layer. Sprinkle with walnuts; press nuts gently into caramel to secure. Cool in pan on wire rack. Cut into 36 bars or triangles.


Ingredients


Beat Butter and Brown Sugar together


Add flour and salt until crumbly


Press into pan and bake for 15 minutes


Sprinkle with chocolate and cover with foil


After chocolate has set, evenly spread melted caramel over the top,
and then sprinkle walnuts and press walnuts into caramel.
Let cool and set.

Side note: I put them in an airtight container once they cooled, and then into the refrigerator; I think they were better.

I hope everyone has a safe and Merry Christmas this weekend.  I'm off now to finish up my baking (Oreo Truffles and some Chocolate Peanut Butter Cookies and that project (can't wait to show you next week)!

Linking up with...

2 Days Until Christmas...Cinnamon Roasted Almonds!

I'm starting to stress a little, because I still have a couple more things to bake and finish that project I've been working on...but I should be ok, because I decided to take off work early today so I can be sure to tackle it all!

So you know the awesome Cinnamon smell when you walk into the Mall around the holidays?!  That has to be one of my favs about the mall around this time...those Cinnamon Roasted Almonds smell so good and they are really tasty!  Well our house smelled just like that last night, because I made some of my very own!  And let me tell you, they are just as good as the ones you get at the mall!!  I found the recipe here back in October and knew this would be perfect for Christmas!  Mmmm...so crunchy and sweet, I can't wait to share them with family!  Enjoy!

Ingredients:
4 cups Almonds
1 Egg White
1 teaspoon of Vanilla
1/4 cup Brown Sugar
1/4 cup Sugar
1/4 teaspoon Salt
1 teaspoon Cinnamon

Directions:
1. Preheat your oven to 250, line 2 baking sheets with foil, and lightly grease pans(I only used 1, and definitely line it with foil and spray it!)
2. In a large bowl beat the egg white until it becomes frothy
3. Stir in the almonds and vanilla
4. In a separate bowl, mix sugars, salt, and cinnamon together.
5. Add the sugar mixture over the almonds, and toss to coat (I just gently stirred them until they were evenly coated)
6. Evenly spread on to baking sheet
7. Bake for 1 hour until golden brown. Stir occasionally so they'll bake evenly (2-3 times).
8. Try not to become addicted to these little guys!!


Ingredients


Step 1: Beat egg white until frothy (sorry not the best picture)


Step 2: Toss in almonds and vanilla


Step 3: Add in sugar mixture and gently stir to coat evenly.
(See all that goodness on those Almonds!!)
Bake for 1 hour stirring occasionally until golden brown...ENJOY!

MERRY CHRISTMAS!

Linking up with...

Wednesday, December 22, 2010

3 Days until Christmas...Peanut Butter Candy "Cane"ine Treats!

So much to do, but I'm feeling as if there isn't enough time...there's only 3 days left until Christmas is here!!  I'm going to do what I can to get all of our goodies baked, D's presents wrapped (before Friday), and a project/gift finished!  Sometimes when I think about everything, I get a bit overwhelmed...but then I stop and think that it's all for a great celebration!!  I really do love Christmas!

Last night I spent the night working on that project/gift, cooking supper, doing a load of laundry, and also managed to bake some homemade dog treats!  Yep, you heard me right...I baked some treats for Bernie and his doggie friends that we'll see over Christmas!  I found this recipe over at Dukes' and Duchesses (she has tried other recipes for homemade dog treats, go check her blog out!) and just knew I had to make them for Bernie for Christmas. 

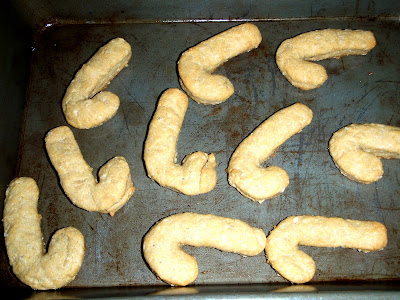
I didn't have a "dog bone" cookie cutter, so I used a Candy Cane...
I call them... Peanut Butter Candy "Cane"ine Treats! (clever, I know!)

Ingredients:
1/2 cup Water
1/2 cup Oil
2 Eggs
3 tablespoons Peanut Butter
2 teaspoons Vanilla
2 cups Flour
1/2 cup Yellow Cornmeal
1/2 cup Oats
Directions:
1. Blend wet ingredients together.
2. In a separate bowl, whisk dry ingredients together.
3. Blend dry ingredients into the wet ingredients until form into a dough ball.
4. Roll the dough out into 1/2" thickness, and cut using your favorite cookie cutter!
5. Place the cutouts on a lightly greased cookie sheet.
6. Bake at 400 degrees for 20 minutes.
7. After 20 minutes, turn oven off and let cookies cool in oven until they are hard.
8. Let your taste tester try one out, and store the rest in an airtight container!
Ingredients

Step 1: Blend all wet ingredients together


Step 2: Whisk dry ingredients together
 
Step 3: Blend dry ingredients in with wet ingredients, form dough ball.

Step 4: Roll out dough to 1/2" thick, and cut out with your fav cookie cutter

Step 5: Place cutout on a lightly greased cookie sheet and bake!


The finished product after letting them cool and harden in the oven.
 
Certified Taste Tester!
I promise you that's a treat laying by him under the table!!
Oh and he LOVED his candy cane treat!!

Linked up with...
 

Tuesday, December 21, 2010

4 days until Christmas...

I seriously can't believe that there are less than 4 days left until Christmas...time has really flown by this year!  I love Christmas and I can't wait to spend it with our families!  I am all done Christmas shopping (finished it with D on Sunday), now I just have to work on wrapping everything (everything is wrapped, except D's stuff!), baking some goodies to share with family, and work on a project for a Christmas gift.

Last weekend was our company Christmas Party, we had such a great time!  All of the girls got scarves and something little/fun, and the guys all got different funny gifts!  I haven't laughed so hard in such a long time, just what we all needed!
Me and my love...Don't you just love his "Grinch" boxers (along w/fart powder)?!?!
And yeah, the laughs didn't stop there...
he wore those into the bar after we left the restaurant!
On a side note, I LOVE my scarf I got!
That's all I really have for today!  Off to work on that project, and bake some homemade dog treats!  I hope to have more to blog about tomorrow and/or Thursday!!

Thursday, December 16, 2010

Breakfast Casserole - with a little kick!

I saw this recipe for Breakfast Casserole over at DIY Design Fanatic (love Pam's blog, btw!! go check her stuff out!), and thought it sounded so good; I could hardly wait to give it a try!  Earlier this week I wasn't sure what to make, so I got to looking around at what we already had at home, and we had everything for it.  So Breakfast Casserole it was...with a few additions of my own!  So here it is...

Mmm...look at those jalapenos!!

Ingredients:
1 lb sausage, cooked
1 can of flaky biscuits
6 eggs
2 cups of Milk
1 tsp of salt
1 cup shredded cheddar cheese
1/2 Onion, finely diced (optional, my addition)
2-3 Jalapenos, seeds removed and diced (optional, my addition)
Bacon Bits (you can use fresh bacon, or the ones you buy...optional, my addition)
Black Pepper to taste (optional, my addition)
Salsa for topping (optional, my addition)

Directions:
1. Grease baking/casserole dish (11x7 is what I used), try to use one with a lid.
2. Split the biscuits in half and lay them into the bottom of the dish.
3. Spread fully cooked Sausage over the biscuits.
4. Cover with Shredded Cheese.
5. In a medium bowl mix together milk and eggs, and add Diced Onion and Black Pepper.
6. Pour over Biscuits, Sausage, and cheese.
7. Sprinkle diced Jalapenos and Bacon Bits over mixture.
8. Cover dish and put into refrigerator overnight (I did this on my lunch break and left it in there for 5- 6 hours instead of overnight)
9. Bake for 40-50 minutes at 350 degrees until golden brown; start checking it at 40 minutes. (mine was perfect at about 45 minutes).
10. Cut up, serve, and top with Salsa if you want!!  Mmmmmm!

Hot, right out of the oven!
  
It's delish with or without Salsa!

This would be so good after a long night out on the town with your friends, or even New Years Day!!  ;)


Linking up with...


Wednesday, December 15, 2010

A little of Mo's, Buck Huntin', and killing 1 bird with 2 stones kind of weekend!

This last weekend we went back to my {small} hometown so D could try 1 more time looking for his "trophy" buck, and so that Ashley and I could finish up our Christmas shopping.  Well I have good news and bad news; Good news was I made a huge dent in our Christmas shopping, but bad news was D still didn't wind up with his buck.  He said there were several opportunities to get other bucks, but something would always go wrong.  He was pretty bummed out since Sunday was the last day to hunt bucks.

Friday night we loaded up and went out to dinner about 20 miles southeast of town, to a little town called Beaver.  I haven't ever been there, so I was pretty excited (the weekend before we went to a small town called Galatia to eat).  Mo's isn't just a place that makes awesome burgers, but they also have their own little brewery.  Since I'm not a fan of "funky" beers (as I call them), D and my dad ordered a sampler so they could try everything.  After supper D decided he wanted to get a Growler of the "Crazy Hawk" Red to take home...that was his favorite.  Here are some pictures I took from Mo's...

Sample of all their beers

LOL! Loved this sign!


Mo's brewery set-up
 
Dad and D's Growler of "Crazy Hawk" Red!

Saturday morning Ashley and I headed out of town to go Christmas Shopping.  I knew I had a lot to buy, because I had barely even started (that's so not like me either!).  First stop was Kohls...let me start by saying that I.Love.Kohls.  We did the best shopping there.  We saved almost $100 more than we spent...their Door Busters were that amazing!  Second stop was Target, I had a couple of returns and we goofed off in their for a little bit.  It was already 1 o'clock, so it was time to go stuff our faces with Margarita's and yummy food at Carlos O'Kelley's.  And yes, the Margarita's were to help us with our anxiety that we had already from the hustle & bustle while shopping!   

Our Jumbo Marg's, only $4.99!
After eating we headed to the Mall, and we were there forever it seemed!  It was 5 o'clock already, and it was getting really dark, so we headed to Hobby Lobby.  We both have a lot of love for the HL, so we couldn't resist!  Next thing you know we're getting swept up by the workers and we thought "can't they do this later on?".  So I looked at my phone and it was already past 7 o'clock!  We knew we had to get out of there, and quick since it takes about an hour to get back to Ashley's house.  But first we stopped at McD's for a little pick-me-up coffee drink...here is how the next 10 min went...
Pulling up to the McD's Order screen, with the window up...finally rolling the window down...
Me: <coughing, like hello where are you> Ahem Ahem Ahem
McD Lady: You can order whenever you're ready ma'am
Me: <cracking up, bc we realized she welcomed us already while our window was up...oops!> We'd like 2 medium SF Vanilla Latte's, please.
McD Lady: Okay, you're total comes to Blah Blah Blah...please pull around.

Getting back on to the Interstate to start our way home...
Ashley: <starts cracking up out of nowhere...>
Me: What?
Ashley: <still laughing hysterically...>
Me: <starting to laugh too> Seriously what's so funny?
Ashley: Ahem Ahem Ahem...I can't believe you did that!
Me: What...I had something in my throat?!
Ashley: <starts cracking up again> I call BS on that one!
Me: Whatev...I did too!
Ashley: You're so full of it! You were trying to get her attention and she had already asked us what we wanted!
Me: Ok, so what?!  I really did have something in my throat, AND I may have been trying to get her attention.  I am so proud of myself though...I killed 1 bird with 2 stones!
Ashley: <laughing so hard by this point> You did what?!  You mean you killed 2 birds with 1 stone?!
Me: Yeah, that's what I said!!  I'm awesome!
Ashley: Yeah you're so awesome, you killed 1 bird with 2 stones!!!

Alright...maybe you had to be there for that classic "Kayla" moment!!  But yeah, we about pee'd our pants!

Sunday we went to see my cousin's new baby girl, she's about 1.5-2 months old.  Her name is Chevelle...I love it!  She is such a doll, and her big sister Bailee just loves her!
 
Me, Chevelle, and Bay!

Stay tuned...I have a yummy recipe, and some Christmas Decor updates to share!